Saturday, 27 September 2008

We Are Back

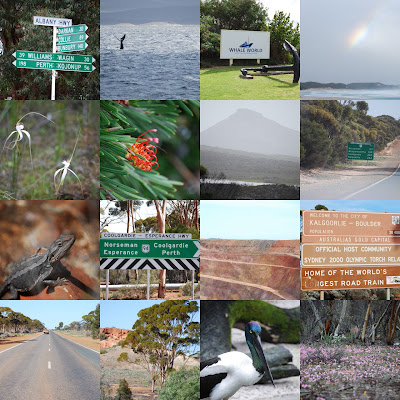
What a long time since our last post. We are back from a little holiday to W.A. (Have been back for a week but what a busy week it has been - no time for posting and even less time for catching up with my overflowing Google reader). We spent time in Perth, Fremantle, Albany, Esperance and Kalgoorlie. The weather was not the best but we saw all manner of beautiful and interesting things - scenery, wildflowers, mining history, wild windy water, a whale, tingle trees, tall trees and lots of straight roads!


This is just a sampling of the many photos that were taken.

Will post some crafting stuff soon.

Saturday, 6 September 2008

Finished At Last

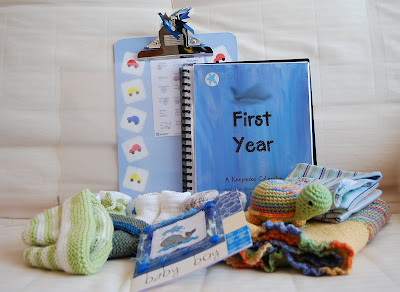
One baby present all finished, wrapped and ready to post. I love being able to greet a new member of the extended family with lots of little handmade goodies - some practical, some just frivolous and some intended to continue a family tradition.

Name smudged deliberately.

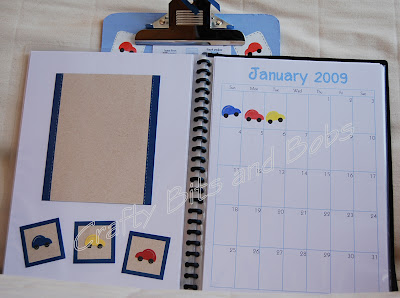
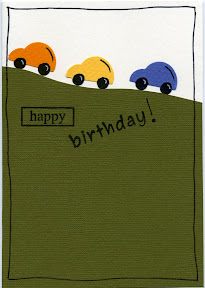
The keepsake calendar was the one thing holding up the posting of this particular parcel as I tried hard to get all the pages ready in amongst a whole heap of work. I use Scrapbook Designer Plus (link just to show the software picture) to create the basic calendar pages and then printed these onto heavier weight card before decorating. This time I chose to make little car stencils using a car punch and some leftover laminating scraps. I added the wheels with my black Dottarific pen and a little bit of silver gel pen highlight.


The calendar starts with the month that my nephew was born in and continues through to end with that same month one year later. I decorated a wooden clipboard as a holder for the current month and opposite each month, in the book, is different decorated page for photographs. I also include a set of stickers I have created using MS Publisher to mark milestones along the way.

This is the third one that I have made this way. My initial design came from looking back at my own children's calendars - one purchased and one handmade.

Other parts of the gift have already been blogged about. There are booties, little hats - knitted by Avid Crafter, little onesies - found on special at a local shop, pram blanket and crocheted tortoise.

I received many little pairs of bootees when my children were born - all lovingly hand knitted by a very creative Aunt. She has since passed away and I think it is nice to continue the bootee tradition - even if the bootees hardly get used.

Our little trip is getting closer - this might be the last post before we head of to explore parts of Western Australia. We will see how things go.

Monday, 1 September 2008

Baby Card


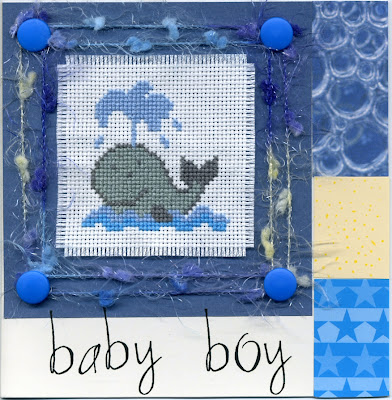
This is the results of around 4 hours work, and that doesn't include the time taken to do the cross-stitch - that was already done! Everything is taking a long time at the moment, I have a head cold and thinking is very hard work! I'm actually quite lucky that I haven't been sick before now as there's been lots of illness flying around the schools all winter. So excuse any waffle or mistakes, my brain isn't working.

We had the presents all ready for this new baby cousin, born late August and really needed a card. So all the supplies got pulled out and looked through it all to try and figure something out. I have a folder full of completed cross-stitches that haven't been made into anything yet and this little whale was in there and seemed suitable for a baby boy card. Then I found some scraps of blue card that fit in colour wise. And then I found the Tie-Downs that I picked up free somewhere along the line in the 'Jewel' colours. Everything sort of started to fit then. The letters are a Making Memories rub-on alphabet called 'Heidi', that I really love. The blue fluffy fibre is just cheap Chickenfeed yarn, and the cross-stitch itself was an Anchor kit I stitched up quite a while ago and it's just sat around ever since!

Now we just need to write in the card and the whole package can be sent off to bub and family.

Thursday, 21 August 2008

How Charming...

I couldn't resist that title!
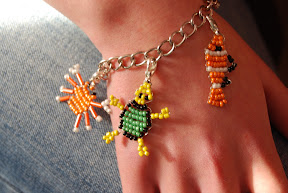


I recently finished off a charm bracelet kit that I bought years and years ago through the school bookclub. The kit had the bracelet, beads, wire, clips and instructions to make 5 different under-the-sea themed charms.

I love the finished result, but they were soo fiddly to make!! The instructions required that at some points, 4 lengths of wire would pass through one bead each time and there was no way that was going to happen! So they worked with a little bit of instruction-tweaking, a fair dose of patience (well, sometimes), pliers and help from Crafty Things. If I was going to remake the charms I would use finer wire to make life much easier.
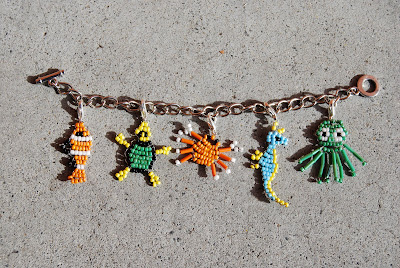


I started off with the turtle, and didn't really have many problems until I came to attach the lobster clip used to clip them on the bracelet. It was one of those 4-length circumstances. Hmm well, quite a bit of frustration later and it was attached safely. Next was the fish. No trouble with the charm but I'd learnt about the clip attaching now. The instructions said to attach it to the centre bead of the big fin but it already had two wire lengths through it so the fish's mouth it was. Next was the crab and I made the charm and then left it for a while (i.e. years) until I attached the clip. Instead of putting the wire through the one bead I used a few of the nearby ones to secure the clip and that worked ok. The octopus and seahorse were made in quick succession. I had a little trouble with the octopus' legs - the wire tail would go into the bead ok but not out the other side because I'd pulled the row a little too tight. The beads had no room to move and there was no way to change it. So don't look to close at his legs because it's extremely untidy. I had similar trouble with the seahorse. You make a right angle turn at the end of his head involving sliding the wire through the entirety of a previous row. The row happened to be bent and the wire refused to got through properly until we could get the row to straighten up a bit.

When I first got the kit the bracelet was quite a bit too big for me, since I've always had small wrists, but now it fits pretty well. As you can see in the top photo, the charms are pretty big (approx 3.5cm long) which makes doing some things (for example typing) difficult. But I'm happy with it.

Who knows, I might just collect myself other, smaller, charms and make it into a really intricate, full charm bracelet that isn't quite so themed.
Friday, 15 August 2008

Still Sewing

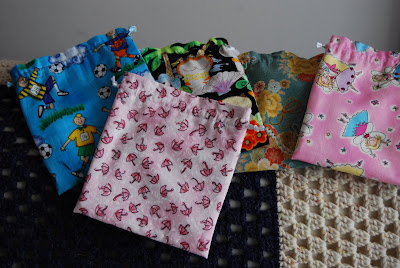
Well I am still sewing along but it will slow over the next few weeks as other parts of life take priority. This time I have had some fun making lined drawstring bags as per the instructions on this blog. These are a great size for stashing small items in for packing and I have also found them useful for taking coins to the bank. My DD is busy selling chocolates to raise funds for her school band trip later in the year so many coins find their way home.


I am going to vary the size of the bags when I make the next ones. Maybe some big enough to put shoes in. They will be very useful on our trip that is getting nearer now. The fabric is a varied selection from the stash - some is over ten years old and some purchased recently.

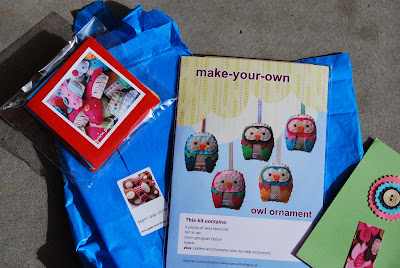
Next little sewing task came from the purchase of this great little felt kit from paper-and-string.


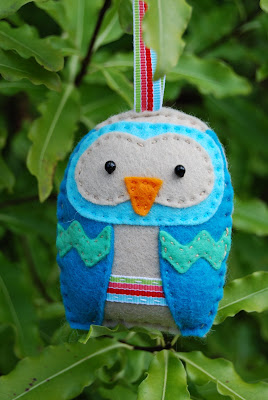
A terrific little felt kit to make a little owl ornament from felt. Look at how wonderfully it was packaged and I was also lucky enough to order at a time when some free felt squares were being added to every order. Lucky me!! I wanted to start as soon as the parcel arrived last week but I was very good and finished off the drawstring bags, did the housework, went to work, taxied children and all that other stuff that intervenes with perfectly good creating time - not to mention watching lots of Olympic events on television. Anyway I have found a little time for the creative stuff of life and here is the little critter all finished up.


I enjoyed stitching it and will be creating a few extra a one is never enough for owls - you have to have a parliament or they get lonely! I got everything needed to make one owl aside from thread and needle. There was a pattern, instructions, felt, felt ric-rac, beads and ribbon. I used press and seal to cut out the pattern pieces - have found this very useful with felt. It is see through so that you can lay it over your pattern and trace of pieces and then lay it over the felt to cut out the pieces. Probably not very environmentally friendly being plastic but I get very accurate pattern pieces this way.

The weather has been very wintry this week so finding good light for photos has been difficult. There was a little bit of sunshine earlier so the little owl found its way outside for a quick pose in the trees. The pouches were just photographed inside as there were no dry spots to put them down outside. Another wintry shower is moving through as I type - wetting the clothes that I foolishly hung outside on the clothesline in a vain attempt to get them dry. Oh well they will just have to have a second spin through the washing machine later and then get hung on the clothes-airer - just have to wait for what is already on it to dry first!

Crafting is so much more fun than housework.

Sunday, 10 August 2008

Sharing Some Gift Sewing

I have had a great time lately making things to give away. The best kind of making there can be!


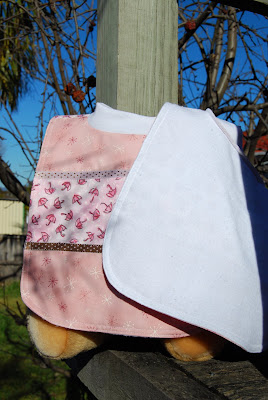
First I made two bibs for a little arrival in our street. Lovely neighbours who have helped me out on a few occasions so it was nice to just make a little something. These are based on a pattern that I made when my own two were much younger than they are now. I used to make these out of terry towelling and thought that this time I would try something different. I joined some different cottons together to get the front fabric and flannelette for the back. The bibs have a ribbed neckline. Two pieces of fabric were sewn together, turned through and topstitched before the ribbed neck piece was overlocked on to finish them off.


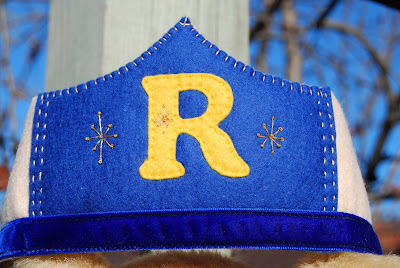
Second was a birthday crown, pattern from The Creative Family book, for a little fellow turning two. This was great fun to make and lasted on the recipient's head for a grand total of two seconds before it was ditched onto the floor. No matter - hopefully it will gain a second life as a dress up item down the track. Gracefully modelled here by one of my treasured bears - Alexander Growly Bear.


I had lots of fun rediscovering the joys of hand stitching with this one. I tried out a variation of a French knot to create the stars on the blue piece of felt. I read about this in my newest collection to the home library. The book was blogged about here but I had to return the library copy. Luckily for me I came across a cheap copy in one of my local bookstores so it came home with me! The stitch has a French knot at the end of a long straight stitch and it is done all at the same time. (Terrible description but I am not sure how else to describe it.)


Being made at short notice I couldn't find any braid to put around the bottom so I settled for a piece of velvet ribbon. I quite like the regal feel that it adds to the crown.

Third, a quick card to go with the birthday gift. I opted out of a little boy type card and went with a design from another book on the shelf called Punch Art Fun For Everyone 3. Lots of great, quick ideas for cards in all of these books - I also have books 1 and 2.


Still working on a few other little things but will save those for another day.


P.S. We are going to Perth WA soon!! A family holiday and a Junior Robocup National competition to attend.