Oh dear it has been a long time with no posts! There has been some crafting happening but as it is mostly Christmas presents it remains unseen. A birthday has been celebrated, a tree has been decorated, an advent calendar has been hung and the days are filling in.
I can very much relate also to this post. Lots of little units of time being juggled to get all manner of stuff done.
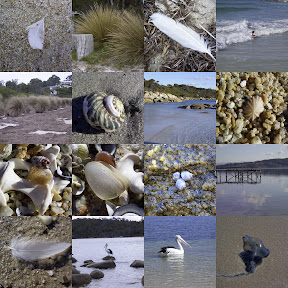
Will leave you with a quote for the day and a mosaic of beach things.
"The world is round. Only one-third of the human beings on earth are asleep at any one time, and two-thirds are awake and up to some mischief." - Dean Rusk
Wednesday, 19 December 2007
Wednesday, 5 December 2007
Christmas Ornament
During my blog cruising this week I came across this little birdie. This, along with the purchase of some Christmas fabric, inspired me to create the little bird below. I have not added the bead feet to this ornament but will try that with the next one.
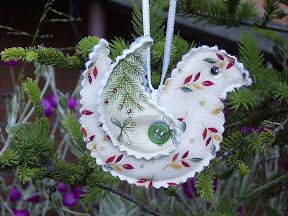
The wings are held on with the buttons and the eyes are sequins and small beads. The hanging ribbon is threaded through the body by making a small hole with a piercing tool.
I used the sewing technique from I'll Teach Myself Sewing Machine Fun by Nancy Smith and Lynda Milligan. The design is drawn onto freezer paper and this is ironed on to the fabric before anything is cut out. Batting is sandwiched between two pieces of fabric (the top piece has the freezer paper pattern pieces ironed onto it) and pinned together. Each pattern piece is then sewn around and then cut out just outside the stitching line. I used pinking shears. I have had the book on my shelf for quite a while and found it very useful when Avid Crafter and her brother were starting to use the sewing machine. I have seen another book called The Best of Sewing Machine Fun in my local Spotlight store recently.
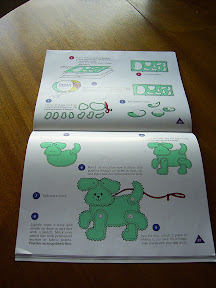
The book has instructions and patterns for a button up dog or cat. Avid Crafter and I have made the cat and Avid Crafter attached her cat to a patchwork bag. The cat and dog are about 28cm wide and 26cm high. My ornament is about 9.5cm wide and 8cm high. This small size made it a little trickier to cut out with the pinking shears.
Saturday, 1 December 2007
Coinless Wallet
Yet another dabble with a pattern from Bend The Rules Sewing. This time it was the coinless wallet. There were a few constructions issues with this one - most stemming from the need to have it produced in very short time frame.
Oh boy do I wish that there were full size patterns instead of the need for enlarging. I am certain that I used my scanner correctly and had the correct size but the cards didn't fit. Well they did fit when turned sideways but not snugly and they would fall out easily. I found it hard to visualize the size that it would end up after sewing. I think that I would add some width to the pattern and reduce the length for my next try. The stitching lines for the folds appear to work exceptionally well with the cards turned sideways whereas if they were lengthwise there would be a lot of extra space between the pockets. The slightly off centre button is another thing I would be more careful with next time.
Many apologies for the poor quality photos but again time was against me. This little wallet was being put into use straight away so down on the floor it went in a sunny room that have a quick snap - no time for a nice outside spot.
Subscribe to:
Posts (Atom)