

The idea for the bean bags and the little basket for them to be stored in came from Mel's blog - Day to Day. There are a few tutorials I have come across for making the fabric basket. The particular on I used was from the blog - Pink Penguin. I think I originally came across the link via A Spoonful of Sugar.
The basket was very quick to sew and if your were short on time it could easily be made without the patchwork squares at the top. It fits four of my bean bags in it.


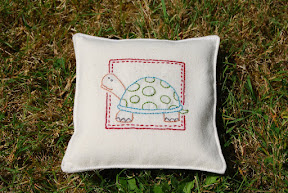
Each bean bag is about 14 cms square and has a plain fabric backing of Osnaburg which has a slight texture to it. I backed both fabric pieces with whisperweft interfacing (this interfacing is good for when you still want a drapy feel to your fabric but need a bit of stability) and each one has polyfil pellets inside. The seams are topstitched and the one with the opening has been stitched over twice so hopefully the pellets will not escape. The advantage of the pellets over rice or beans is that the bags are washable. I tested one using the gentle cycle of my washing machine. I put the bean bag inside one of those little zipper washing bags before adding it to the washing machine. It has gone through the washing machine adventure with flying colours - looks no different to when it when in.
All in all I am feeling quite pleased with the end result. I will definitely be making some more of the baskets.

Hi There. Your fabric basket and bean bags are lovely, My favourite has to be the ladybird design. xx
ReplyDeleteThe panels look amazing as little bean bags. What a sweet idea!
ReplyDeleteYour stitcheries look perfect as little bean bags!!
ReplyDeleteI love your little stitcheries.
ReplyDeleteHey thanks for leaving a comment on my blog. I just enlarged the squares and then once I had them all joined together I measured the width and kinda had an educated guess on the height based on the original height to width ratio, good luck. ps a small adjustment seems to end up in a big difference at the end
ReplyDeleteadorable! what a great idea to do both the basket & the bags. i could see these being a great gifts for boys.
ReplyDelete