Sunday, 10 August 2008

Sharing Some Gift Sewing

I have had a great time lately making things to give away. The best kind of making there can be!


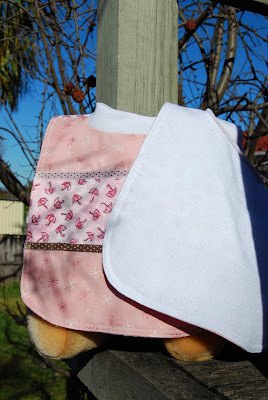
First I made two bibs for a little arrival in our street. Lovely neighbours who have helped me out on a few occasions so it was nice to just make a little something. These are based on a pattern that I made when my own two were much younger than they are now. I used to make these out of terry towelling and thought that this time I would try something different. I joined some different cottons together to get the front fabric and flannelette for the back. The bibs have a ribbed neckline. Two pieces of fabric were sewn together, turned through and topstitched before the ribbed neck piece was overlocked on to finish them off.


Second was a birthday crown, pattern from The Creative Family book, for a little fellow turning two. This was great fun to make and lasted on the recipient's head for a grand total of two seconds before it was ditched onto the floor. No matter - hopefully it will gain a second life as a dress up item down the track. Gracefully modelled here by one of my treasured bears - Alexander Growly Bear.


I had lots of fun rediscovering the joys of hand stitching with this one. I tried out a variation of a French knot to create the stars on the blue piece of felt. I read about this in my newest collection to the home library. The book was blogged about here but I had to return the library copy. Luckily for me I came across a cheap copy in one of my local bookstores so it came home with me! The stitch has a French knot at the end of a long straight stitch and it is done all at the same time. (Terrible description but I am not sure how else to describe it.)
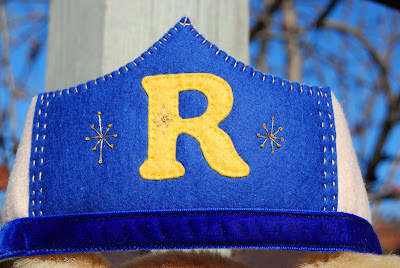


Being made at short notice I couldn't find any braid to put around the bottom so I settled for a piece of velvet ribbon. I quite like the regal feel that it adds to the crown.

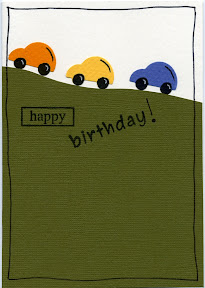
Third, a quick card to go with the birthday gift. I opted out of a little boy type card and went with a design from another book on the shelf called Punch Art Fun For Everyone 3. Lots of great, quick ideas for cards in all of these books - I also have books 1 and 2.


Still working on a few other little things but will save those for another day.


P.S. We are going to Perth WA soon!! A family holiday and a Junior Robocup National competition to attend.

Saturday, 9 August 2008

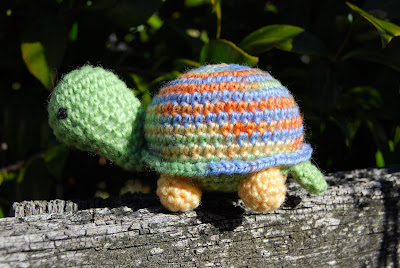
Another Amigurumi Tortoise


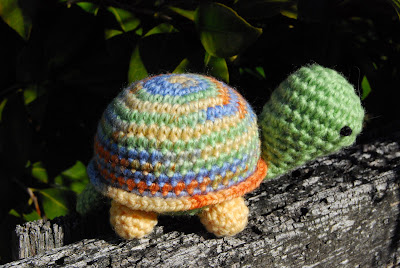
The creating is continuing, although I have not got back to my little felt book yet - still mulling over ideas for the next pages, with another little tortoise being created using the same yarn as the pram blanket. The pattern is from Simple Arts Planet and is very easy to make. I used French knots for the eyes so that it is safe around young children.


Another view - the french knot is very clear in this shot. I used to avoid french knots but have recently revisited them courtesy of all the great how-to's that are accessible via the www. I would love to link to a very good video tutorial but I didn't bookmark it. It was a very clear tutorial on making great French knots.

Speaking of knots check out this site. Another great little suggestion that I came across the other day.

Wednesday, 6 August 2008

Some Stuff

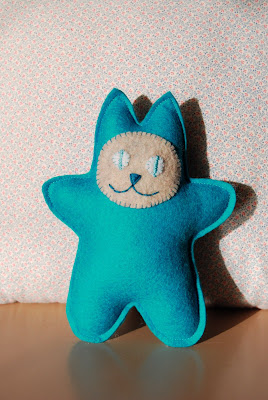
Here's the latest of our sewing stuff. I made another little Arno Cat softy to give to my 2-year-old cousin. It's made from wool felt and was really a joint effort from both of us. I hand-sewed the face and Crafty Things did the machine sewing to put him together and stuffed him.


He is from the Softies book and is very quick and easy to make. He is the perfect size for little people to hold and play with.

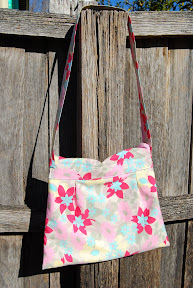
Another present has also been made for a friend of mine, whose birthday is tomorrow. I thought of a bag idea that I liked and Crafty Things tried to make it up. It didn't turn out quite as I imagined but I still like it.


The front view. It has two small pleats to give it shape, a longish strap and flap held shut with a magnetic clasp. After it was finished I thought it needed some decoration near the bottom as it was rather 'top heavy' so we came up with adding the ribbon bow. Crafty Things found the instructions to make the double loops which looks more interesting than a normal one. It is on a coil-less safety pin so that it can be taken off. It is lined and we made a matching zippered pouch and handbag organizer to keep everything tidy inside.


The back view. The flap was put on after the bag was finished and lines up with the pleats, kinda by luck. Size-wise it's in between a tote bag and handbag so that the recipient can fit everything under the sun inside it! We put a layer of flannelette in between the bag and lining to make it a bit firmer, like in Amy Karol's book.


Next time, I'd make the pleated part a bit shorter and add a yoke on top so the pleats are further down and not as hidden by the flap. The strap could also be a little narrower.

Tuesday, 29 July 2008

The promised pictures

Here they are, the pictures of my lovely mail and stitching.

First, the opening of the package:

This is how it appeared.


And this is what was inside.


The goodies! I can't wait to try them out. Unfortunately there was some strawberry body scrub that leaked on the way and so isn't in the picture.


And this is my progress on my stitching. Quite a bit more than in the last photo!

Monday, 28 July 2008

Pause in Page Creation

Just taking a little pause in the felt book page creation to think about what to do on the next pages. Meanwhile inspired by the hoop sewing from The Creative Family book which I have borrowed from the library I made this.


I found some lovely bright orange hessian in Spotlight the other day, along with some cream and natural colours, and also got some of the wooden hoops that I have seen on several blogs for creating wall displays of pretty fabrics. I had just been reading The Creative Family where Amanda had described using burlap and a thick needle to teach embroidery to children and had also seen the stitching she had shown on her blog shop update post and this idea just flowed on from there. Also check out this Flickr pool - Swatch Portraits.

I stitched on the flowers with a small circle just around the middle and then used stem stitch in two greens of floss for the stem of each flower, reversing the colour combination on one of the stems. Just to finish it off I did a running stitch around the hoop with some of the hand dyed wool. After I had finished the stitching I loosened the hoop and removed the inner circle from the back. I put a piece of calico over the back of the stitching and replaced the hoop. This hid all the knots and made the background a little more solid. Last of all I trimmed the fabric flush with the hoop and glued some trim over it to hide the edges of the fabric. A little piece of ribbon and it was ready to hang!

Back view.

Here it is - hanging in amongst all the other assorted bits and pieces I like to look at in my creating room. Incidentally it is also where I do the ironing (when I have to!!) and I have lots of lovely things to look at. The dreamcatcher was made with my kids when they were much younger that now and I still love to have it hanging where I can see it. The cat is from the book I referred to in my post about the bird Christmas ornament. All much nicer to look at than a painted brick wall.

Friday, 25 July 2008

A quick hello

Hello, long time no post. Again. Oops.

I haven't been crafting much except for a bit including a decent bit of the 'Underwater' cross-stitch. It stills seems like a small area, but really it's quite a big chunk of it that I've done. :-)

A little while back I got a lovely package in the mail, I can't believe I've forgotten to post about it! I won a giveaway over at The Felt Mouse and a little parcel of bath goodies made it's way to me. It smelt so good, and the little cupcake bath fizzer looks even more realistic and edible in real life. Such a talented lady!

Hopefully pics of both the parcel and stitching will be here soon.