 |
| From Sewing Stuff |
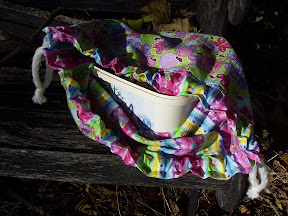
I have been making a few bags just lately. The first two are my own design made to fit around a rectangular plastic ice-cream container. The first one is lined with a contrasting striped fabric and this also make the casing. I find them very useful for travelling in the car and I have made several for my daughter and her friend to use as knitting bags and holders of all things crafty. The bag and lining are just large rectangles with seams at the sides. The next step is to create the sides of the bag by sewing across the bottom at the corners. The ice-cream container is then nicely hidden inside where it holds everything together and give the bag a very rectangular shape. Not a trendy bag but a useful storage bag that recycles the growing collection of ice-cream containers. The bag is just the right size for my French Knitting tool to live in.
The second one is not lined and the drawstring casing is a piece of wide ribbon attached to the outside of the fabric. I loved the spotty fabric. This one was made to hold the ice-cream container I have used for many years to carry the assorted medicines and stuff needed for kids when we are travelling by car. Much nicer than tying it into a plastic shopping bag! The cord for both was made with my very handy Clover French Knitter.
 |
| From Sewing Stuff |
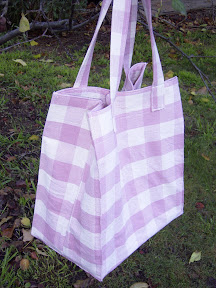
The last bag was my attempt to create a grocery bag like the green bags sold by supermarkets. The fabric is a secondhand table cloth. This was made in a similar way to the other bags. I added some heavy weight iron on interfacing to the top of the lining to make it firmer. Once I had put the outer bag and lining together I added handles. The depth of the sides was much greater than my small drawstring bags so I folded the the sides at the front and back and stitched alongside the fold. This gave the sides more definition. I also made an insert for the bottom which had some stabilizer sewn into it. Not sure if what I have just written makes any sense. I was fairly pleased with the end result, mismatched squares and all.
 |
| From Sewing Stuff |
So each bag basically started out as two big rectangles, seamed at the sides and given side panels by stitching across the bottom corners. Here is a link to a tutorial on creating a simple tote with a good photo of how the bottom corners are done.
No comments:
Post a Comment
Thanks for visiting our crafty blog. Your comments are appreciated.