Well, you'll get both. The good news first.
I am the very lucky winner of a giveaway over at The Felt Mouse. Thanks to her generosity, I'm going to receive one of these lovelies in my mailbox. It's so exciting! The first blogland giveaway I've won. Thanks soo much!!
Now, the bad news.
The computer is refusing to access the internet. Again. So I'm typing this on the clunky old laptop. Again. This time everything is worse! Nothing that we've tried has made the slightest bit of difference. Where are the good computer-fairies when you need them??
Oh, there's a bit more good news I forgot about.
My Crafty Friend and I made a second project from 'Cute Stuff', the Card Holder. Armed with a new stash of felt scraps (like I needed any more, but it was $2 a bag and there were some great colours I didn't have) we made one each.
Crafty Friend's Card holder in progress.
They resemble an small envelope with the flap tucking into a slot to hold everything inside. They were the perfect size; needed no adjusting at all. We chose different designs to applique and then machine sewed them together. Next time I'd hand sew them as the layers of felt (3 in total in the thickest part) tended to move a lot. Either that or find a walking foot for my sewing machine from somewhere.
Here are the finished Card Holders, front view...
and back.
Mine's the one on the left with the birds, and Crafty Friend's on the right with the girl and cherries. Mine on the back view shows the flap tucked in and her's out since unfortunately the cherries get hidden. We had a disappearing cherry too! One of the small red felt circles vanished and after looking in various places; the floor, underneath the book etc., we couldn't find it. It eventually turned up a couple of days later stuck to the bottom of the chair leg of all places.
They took around an afternoon to make all up. Hopefully they will see quite a bit of use.
Monday, 23 June 2008
Monday, 16 June 2008
First Shop Update
Well we have started adding things to our madeit shop. Over the weekend we came up with two different pin cushion designs - a ladybug and a flower. We had great fun trying to make the circle for the petals line up using a compass that didn't want to play fair! Many holey pieces of paper later we had a pattern for a simple eight petalled flower and a cute-as-can-be ladybug. The ladybug that Avid Crafter worked on was so much easier to make than the pattern for than my "simple" flower!
Anyway have a look at the end result.
Three felt creations have now been listed in our shop - the ladybug and the felt flowers with the dyed petals and cream centres. We have a link to the shop in our sidebar. The extra bumpy looking flower was an experiment with a piece of felted knitting on the top and a circle of acrylic felt on the bottom. Putting all that under the presser foot of my machine was interesting!!
Avid Crafter is keen to tell you that her ladybug is super cute and the legs are pony beads knotted on to a length of cord that is sewn into the body of the bug. She has actually made two but at the moment only one is listed in the shop as the other is waiting for a photo shoot opportunity.
Crafty Things has to report that hand dyeing the petals of felt pin cushions is an interesting experience. Acrylic felt melts if too much heat is applied (whilst trying to heat set dye) and stuffing absorbs lots of unwanted dye if you try to dye the petals after sewing the two parts of the pin cushion together. One flower pin cushion of the three I produced yesterday is definitely staying at home - complete with little melted patch and dyed innards. It went nowhere near a camera either. The fourth - the piece of felted knitting - will also be staying home at the moment.
Avid Crafter was much more successful with her design. No troubles at all!! Her prototype was good enough to list in our shop.
The other little item we have listed is called a Helping Hand. It is a little felt clip that Crafty Things used to make many, many, many years ago (in fact probably when she was the same age Avid Crafter is now!!!) Gosh such a long time ago. The pattern was found in a basket of embroidery threads. We still use one of the original ones made by Crafty Things to hold our stamp booklets together and stop them from getting lost in the drawer they are kept in.
The clip, an old style, flat hair clip, slips inside the two felt hand shapes to make a very pretty little holder. Finding the clips was not easy - one place we asked said they had not stocked any like it for years, one was more helpful and directed us to a place selling hairdressing supplies. I remember my Nan using this type of clip to hold her beautifully done hair in place at night, under a little net scarf, when she went to bed.
We would love it if you dropped by our shop to have a look. Unfortunately, at this stage, we are restricting ourselves to Aussie buyers only.
and Avid Crafter.
Saturday, 14 June 2008
Guess what!
We have started up a shop at madeit to help with our fundraising idea for my school trip later in the year. We've started off very small, with two of Crafty Things' cards for sale. We created our banner from a photo of a strange grass-seed at the beach and added our name.
madeit.com.au is a website based in Australia offering Australian crafters a place to sell their creations.
Soon we plan to add some pincushions, more cards and perhaps a birthday book. We'd better get busy crafting!
madeit.com.au is a website based in Australia offering Australian crafters a place to sell their creations.
Soon we plan to add some pincushions, more cards and perhaps a birthday book. We'd better get busy crafting!
Wednesday, 11 June 2008
An Idea
Crafty Things and I were talking about a school trip I'm going on later in the year. I've been selling chocolates to raise funds to help pay for it but wanted to do something more. We thought of selling some little crafty items, pencil rolls and tote bags, through our blog. Would anybody be interested? It would probably have to be Australian residents only to keep postage costs down. I've never done this sort of thing before so if anyone could help, please let me know! Any suggestions as to how to make it work would be gratefully accepted. Our e-mail address is in the sidebar so e-mail us your ideas or leave a comment.
Some good news - we think we have partly fixed our internet troubles. Hooray! Things aren't quite up to speed but are a lot better than they were. This is great as we were all sick of slow internet!
Tuesday, 10 June 2008
The cutest book covers I've ever seen
Here are our first creations from our new 'Cute' book; Cute Stuff. They're called Book Covers. They're a stiffened fabric rectangle with raw edges turned over, and a turn-back on each end that the covers of the book slide into to hold it in place. We adjusted the measurements to fit the size of books we typically read, for me that means fat ones! They took my friend and I an afternoon to make with a little help from Crafty Things. My friend's book cover is on the left and mine on the right.
There are four different applique options in the pattern: the panda that my friend chose, the bear that I chose, a rabbit and 'Bad Guy'. They're done in felt that is just glued on - no sewing at all. Cutting out the insides of the letters needed very pointy, sharp scissors. Our normal scissors were hopeless.
Another pattern change we made was to add the ribbon bookmarks. We cut a length of ribbon, fray-checked the end and sewed it onto the middle of the cover. Next time we'd sew it into the seam as it would look much tidier. My ribbon was determined to fray at the top too so I fray-checked that end too. Unfortunately we had a bit of a fray-check flood so the top of my book cover is rather stiffer than it should be.
They were made a few weeks ago now. It has taken me so long to get around to blogging about them!! Anyway, they seem to be holding up fairly well to use - the only repair needed has been a replacement panda ear for one that fell off.
Now I think I need a whole set for different sized books since only a few fit my cover really well, I was a bit too generous in increasing the size! A set would make a nice present too.
Wednesday, 4 June 2008
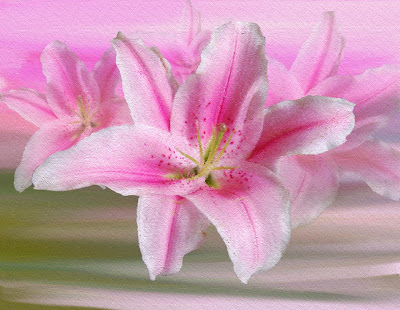
A Little Play with Artrage
I haven't played with Artrage for a while but while looking at some flower photos I thought of using one as a colour palette. I loaded the image as a custom picker and just used random colours to create a background with the paint roller and the palette knife to blend.
I added a new layer and imported the same picture as a tracing image. I used the glitter tool to paint over the flower and erased any unwanted edge glitter. The glitter tool is so much fun when you use it with a tracing image - your picture just appears as you add the glitter to the page! It gives a textured picture that is formed from your tracing image.
The next step was to use the copy layer and transform layer functions to create more flowers - each on their own layer. I reduced the opacity of these flower layers, resized them and moved them around on the page to sit behind the main flower.I changed change the paper settings for the layers and gave the background layer some texture to end up with my finished picture.
I know that I haven't drawn the flower - that would be way beyond me to reproduce it this accurately - I just like changing the texture of the image with the glitter and also having fun blending the background colours.
Tuesday, 3 June 2008
Progress Report
Here's my first update on the 'Underwater' cross-stitch. I've worked on it on and off since starting it in March and here is the progress to date. The biggest fish is finished and some of the seaweed too. It's quite a bit of stitching for me as I'm not exactly the fasted stitcher ever! Looking at how much white space there still is to fill though, well, there's still quite a way to go. This is the biggest cross-stitch I've started so I'm pleased with the progress. I absolutely love the colours! They're so soft and pretty! Just perfect for the blue wall where this will probably hang once finished. Hopefully that won't be too far into the future =)
Great inspiration for continuing on it is my new cross-stitch corner. There's a comfy chair, good light, room to put all my bits and pieces in easy reach and even a t.v. in this room. The wonders of music DVDs!!
I even have more time to stitch since it's the school holidays over here. How times flies! It feels like yesterday was the first day back. I plan to take full advantage of these holidays with plenty of sleeping in, reading and crafting. A pretty good combination don't you think?
Subscribe to:
Posts (Atom)